


Wherever there is an opening in a masonry wall, a lintel will be needed to carry the weight of the structure above it, whether wall or roof. Installing a concrete lintel is not complicated, but it is important to get the basics right.
A concrete lintel is an excellent choice for internal blockwork walls, rendered facades and plaster-finished interiors. Installing a concrete lintel is also cost-effective and can help when you need to keep costs down on a project.
Here’s our guide to fitting a concrete lintel.
Why Choose a Concrete Lintel?
There are several good reasons to choose concrete lintels over steel. The top reason is cost. Concrete lintels are less expensive to produce, even the ones that use steel rebar as reinforcement.
Choosing concrete can save cash on projects that require multiple openings in walls, either internal or external.
Concrete lintels are resilient in a fire and some higher-specification lintels can retain their structural integrity for up to two hours.
In a maritime environment, steel is vulnerable to the elements, sea spray and salt air can seriously impact the lifespan of a metal lintel product. Concrete lintels, even those with encased steel elements are much more resilient in these, or other exposed locations.
Top Tip:
You can avoid the issues of cold-bridging a cavity by using two separate concrete lintels, one on each masonry leaf.

When to Use a Concrete Lintel
There are situations where a concrete lintel is the only or the best choice to carry the load over an opening.
Below DPC Service Entry or Exit
When incoming services or outgoing drainage passes through a below-ground foundation wall a concrete lintel is the only practical choice. A concrete lintel will endure damp conditions where steel would be vulnerable to corrosion.
Internal Blockwork Partition Wall
Concrete lintels are often specified for internal partition blockwork walls as they take a plaster finish well, and most have a minimum of 30 minutes of fire resistance. The economy ranges are also an extremely cost-effective way to carry two or three courses of blockwork up to ceiling height.
External Walls
Fair-faced lintels can be used on external walls, left visible, or fit a textured lintel when the wall has a render finish.
Which Size Lintel Should I Use?
Naylor concrete lintels have a handy calculator to help you select your lintel. The general rule of thumb is that a large opening above 3.6 m (11’ 10”) will require a special-order concrete lintel.
Below that size, concrete remains the economic choice. Openings above 1200mm (4’) will require propping until the mortar has cured.
Lintels start at 100mm wide, which is spot-on for general loads. When a lintel is required to take a concrete floor or a roof load, then a minimum of 140mm lintel will be required.
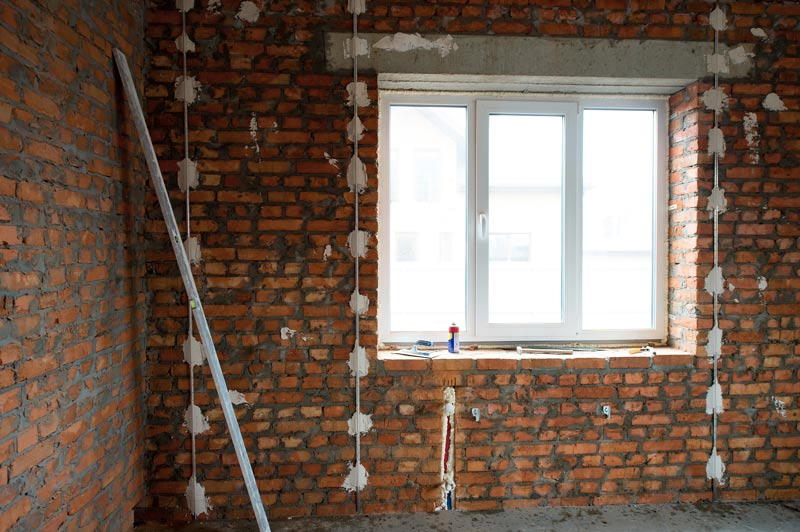
Installing a Concrete Lintel
The first thing to do is to check the lintel for damage. If it has been dropped, crushed, or had other material dropped on it while in storage, it may have become cracked or broken.
A long concrete lintel can be cut down, salvaged, and used elsewhere, but it is usually safer to discard an impact-damaged lintel.
Lintel Bearing
- For lintels up to 900mm (3’) in length, we recommend a bearing of 100mm (4”).
- For lintels up to 2.7m, the bearing should be at least 150mm (6”).
- When spanning openings over 3m, the bearing will need to be 200mm (8”).
Lintel Padstones
For openings below a particularly heavy loading, with joist ends, a roof load, or other detail, you may need to install a concrete padstone to augment the lintel’s ability to carry and distribute the weight.
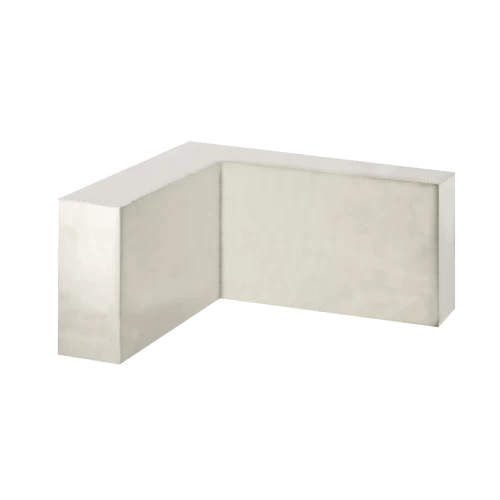
A padstone is used to relieve concentrated stresses, distribute loadings, and prevent crushing or shattering blockwork when significant loads are imposed such as joist ends, trusses, or concrete floor sections.
They are often set at the springing point for arches and designed to prevent the shearing of loads so that pressures are absorbed and distributed evenly through the adjoining structure.
Lintel Setting
- Concrete lintels should be set level on a bed of mortar no deeper than that used to build the wall, i.e. the same depth as the horizontal joints.
- Standard wall construction means that you should fit the lintel on top of a full brick or block. Cut bricks will not distribute the load evenly. This could cause problems down the line.
- Make sure that the lintel is set level across the opening and front to back too.
- On an external wall, you must always install a cavity tray with a weep joint at either end of the lintel.
- For cavity wall installation, a pair of lintels must be level with each other to prevent any excess stress transmitted through one or other lintel.
- Always make sure your lintel lines through properly. Brick or blockwork should not be allowed to overhang the face of the lintel by more than 25mm (1”) or it will not be properly supported.
- Do not drill into or set anchors (either mechanical or chemical fixings) into a pre-stressed lintel as this will weaken the lintel and compromise any warranty.
- Many economy lintels are reversible, which means that you can use them any way up, however, if a lintel has a face marked TOP, then this must be the upward face visible when you install the lintel.
Top Tip:
The average height of a structural opening for an internal door in the UK is 2.1 m (6’ 10“). There is usually a little bit of tolerance, however, it is not a good idea to use the mortar bed to make up the difference.
Lintel Propping
Lintel propping must be in place for any opening wider than 1200mm, with props at a minimum of 1200mm centres.
Props should remain in place for at least 24 hours to allow the mortar bed to cure sufficiently before any further loading is applied. The longer a prop remains in place the better.
Do not make the mistake of using a door or window frame to prop a lintel. They are not structural elements and may distort under the weight of a lintel.
Lintel Loading
The longer a mortar bed has to cure the better for concrete lintel installation. For most mortar, under normal average weather conditions, the bed will cure to 60% within the first 24 hours and take a further 28 days or so to reach 100%.
With this in mind, ending the week by installing your concrete lintels, and giving them a full weekend to cure is the ideal situation.
If you can’t do this, try to spread your masonry workload, and give the mortar as much time as possible before adding further courses of brick or blockwork.
Top Tip:
While waiting for the mortar to cure below the lintels raise the walls between the lintels to completion so that when you return the next working day you will only have to fill in the gaps to complete the lift.
Structural Integrity
Lintel specification on larger projects is usually the responsibility of a structural engineer. Their expertise is not expensive but can prove priceless.
You will usually be able to find one locally.
If you have a one-off, or smaller project, and are in any doubt as to which concrete lintel is the right one for your job then at Wade, we are only too happy to help. Get in touch with our team today to discuss your project’s needs.


Hi Louis,
Thanks for the question. We have to advise speaking to a qualified engineer for issues such as these.
I have upvc door and window of 1350 I want to replace with a 1800 French door to pen on the garden in a two 1930 property . Do I need a lintel Am thinking of a 2.400 concrete lintel ., please advise , thank u .